Stones in My Passway

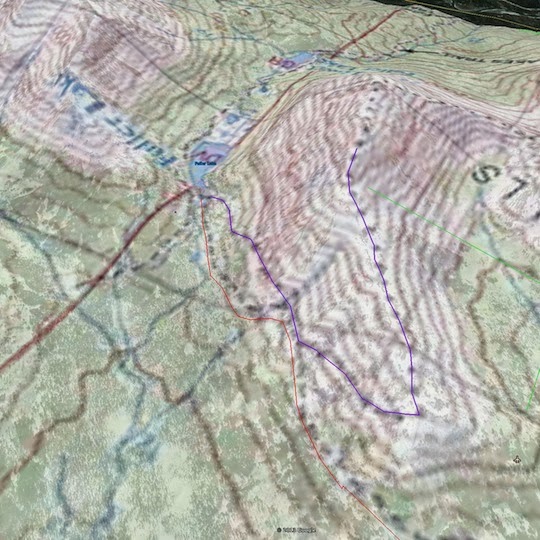
Lost Lake–Primrose Traverse

I guess it finally had to happen: mountain biked the Lost Lake and Primrose trails over the weekend, Running north out of Seward, spending the night at Lost Lake, riding out Primrose trail, and then biking back to Seward.

These two trails are probably the most challenging, yet accessible, that I’ve ridden so farthe rough conditions of the trail balanced out by the fact that they don’t become overgrown over the summer. Overgrowth can really be a factor with the long hours of sunlight, leaving some of the trails on the Kenai Peninsula unusable from mid-summer to the first killing frosts in early September.

The Trails

Lost Lake trail starts at milepost five, just North of Seward. Follow the signs about a quarter mile off the highway, and park. The trail does not bait you into any false sense of security: you pay right up front—rough conditions and a pretty steep grade. 

Fake Out

One issue mentioned in the guide books is a summer-winter route choice a short way up the trail (the trail divides, then meets up again at tree line). Basically one route is better for snow machines and the other for hiking. The way it’s mentioned in the guidebooks makes it sound like a pretty immediate feature, and this is made even more confusing by another trail divide  about 150 feet after leaving the parking lot. As you roll down and up the very first hill the trail diverges with a “Trail” sign with an arrow directing you to the right. There’s a very clear trail to the left and without giving it too much thought you might follow that sign, head to the right, and then second-guess that choice after a 100 yards or so—thinking that you’ve taken the winter route. Don’t worry, you’re on the right trailthe winter-summer “Y” is clearly marked further up the trail. That first break that heads to the right is easier, and meets up with the trail that headed to the left after a few hundred yards.
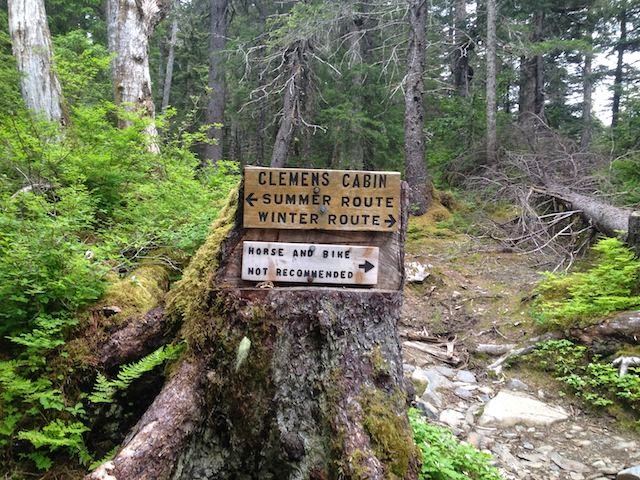
This *is* the sign you are looking for.

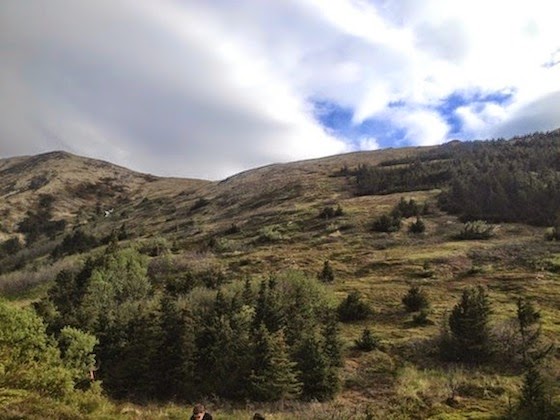
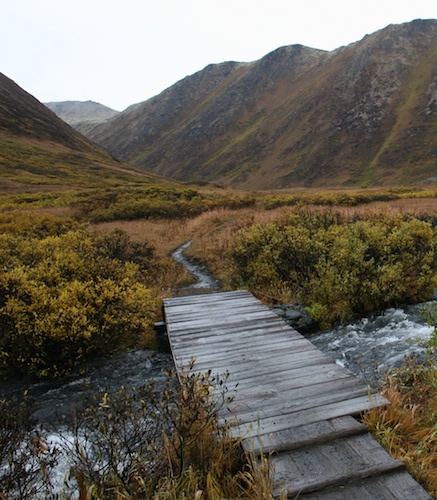
After taking the summer route, just settle in for a fairly robust climb for a couple-three miles to tree line The trail is generally in good condition, with the usual annoying sections. It’s a pretty good hump until the trail breaks out into the rolling meadows above tree line. Be aware of the steep drop-offs as you run up the valley. There are a few spots with NO room for error. Also, there were plenty of places to fill up with water, although that might change later in the season.


At treeline, you’ll meet up with the winter trail, and then it’s a rolling/climbing run with really enjoyable (flowy for a mile or two) single track all the way into the lake. Roughly a mile south of the lake you’ll lose sight of Resurrection Bay behind you, (3g coverage) and several hundred feet in elevation as you run down to the lake.
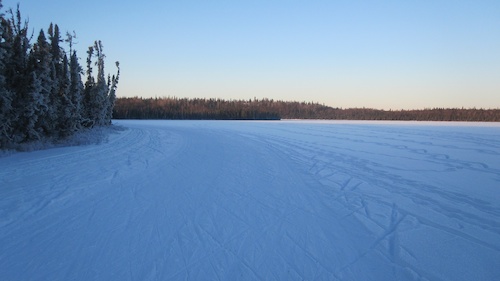
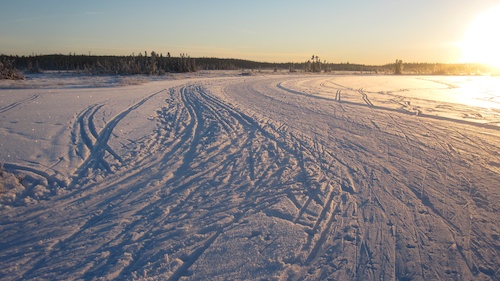
The Lake

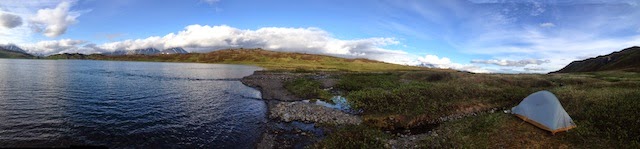
Probably doesn’t get much better on the Kenai.

Pretty impressive lake, with a few good places to camp on the southern shore, but a bunch more on the finger that juts into the lake. The finger rises a hundred feet or so, and might be a better place to avoid the bugsbeing a bit more breezy. Beautiful spot—Marmots everywhere—if you saw Julie Andrews pirouetting off in the distance you wouldn’t think twice. Basically you’re camping in an REI ad shoot.
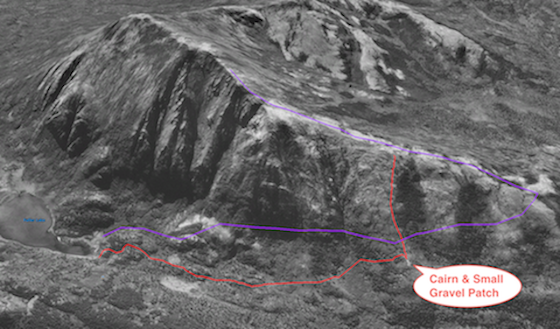
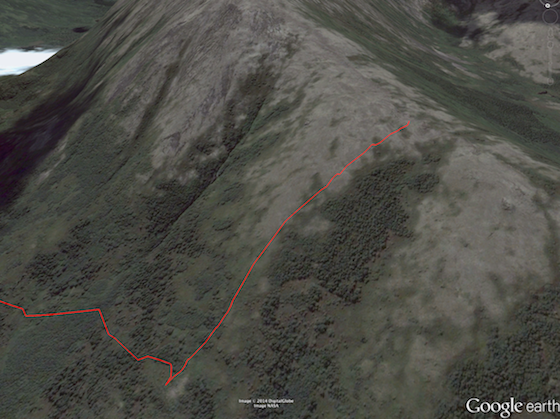
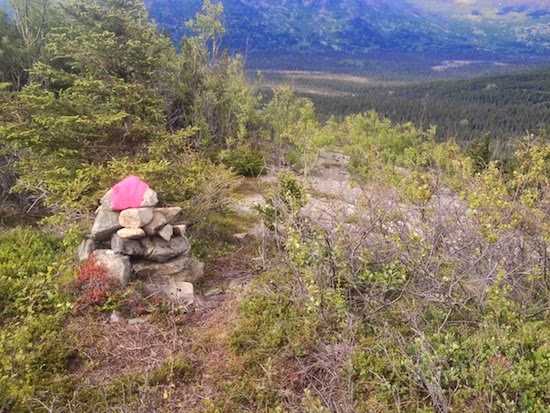
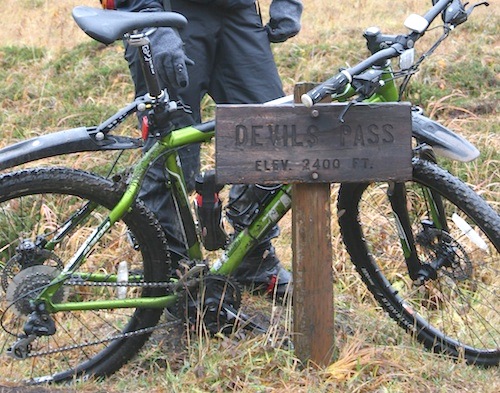
Primrose Trail

If you mountain bike you may have heard about this one—bad, scary, white-knuckle things—and to a degree the rumors are true. The trail in general is very well maintained  but has some features that make biking it challenging in places. Leaving the lake and turning north, you run roughly 3 miles over a ridge, with some fairly regular rough spots (stairs, gaps in the trail, sudden rises), and gain about 600 feet in the process; after that is a about half a mile (it might might be a as little as a quarter mile) of IDIOT SUICIDE STONER BIKER MOVIE TECHNICAL ROCK GARDEN OFF-CAMBER GULLEY trail. Yes, it *can* be done—but it’s a section of trail for seriously advanced riders. The rest of us just need to get off of our bikes and walk.

Once you get past that, you’ve got about two miles of really enjoyable test-your-line-picking-skills section. It’s tricky, but probably right at most regular bikers’ skill level. There’s enough spaces between the roots and rocks to get your speed back down, it keeps your attention, and puts you through your paces. If you don’t ride much, you’ll need to walk large parts of this section as well. The last two miles are basically four-wheeler track with regular root features, but nothing that won’t let you keep up a pretty good pace.

But for comparison: Lost Lake running at about six miles and Primrose running about eight, it took the same time (roughly two hours) to go UP Lost Lake as it did to go DOWN Primrose. So the trail conditions of Primrose will slow you down just a bit.

Back to Seward

The trip back to Seward is mostly down hill, with about five miles of slight/moderate climb out of the Primrose campground before relenting. It took less than an hour.

Great, great, trip.

mountain bike lost lake primrose trail Kenai peninsula single track

Way Out

Demon, exorcised.

For hikers, the Skyline-Fuller lakes traverse is the Kenai Peninsula’s version of the Bermuda Triangle. Every person who has hiked it from the Skyline side knows the trail down from the final ridge to Upper Fuller Lake means bushwhacking. Usually way more than intended.

No more.

The Route

A Little Closer

In the top figure, the purple line is the path shown on “the map”. (That trail is probably overgrown, and that may be something to explore on another trip.) The red line is the way off the ridge, down to a large cairn on a smaller ridge about 3/4ths the way down to the valley. The path from the cairn to the lake has been repeatedly flagged, and is a straightforward hike.

Getting Down

At the beginning of the red line on the ridge, on the trail itself is a small metal marker spray painted an unnatural fluorescent green. That marker has an attached aluminum plate, about the size of a playing card that reads:

TRAIL DOWN TO FULLER LAKE
START DOWN NOW

Do this. Start down the hill and look for flagging tape as you go. About 100 yards down the hill you should see another marker–identical to the first– on a small rise, that reads:

TRAIL TO FULLER LAKE LOOK
FOR PINK MARKER TAPE


The Cairn

Looking Back up from the Cairn

From that marker you should be able to follow the intermittent tape to the gravel patch and cairn. Alternately, the top rock of the cairn has been wrapped in pink flagging tape, which should be visible to sharp eyes, or a using a pair of binoculars, from the ridge. Also, note in the first figure the two banks of trees that form a U-shaped feature on the side of the ridge. Starting down before the first bank of trees, and keeping that to your left will lead you to the cairn, and out.

Here is the GPS route as a Google Earth file:

Link.

Short video that shows the view from the cairn:


Caines Head State Recreational Area

IMG_1862-Version2-2014-05-27-09-47.JPG

Where the Zombies Weren’t — Spring 2014

Caines Head had been on my hiking list for a couple of years — finally did it over the weekend. Basically it’s an overnighter, whether you want it to be or not. The hike takes you along the beach for about three miles, and can only be done at a tide of 3 feet or less. So, except in very rare cases, you’re cut off from the rest of the world until the next tide — except for the four bars of 3G coverage. Hard to take.

Caines Head SRS has one of the few military defenses built during World War II, set up to defend against Japanese attack. There is an abandoned military fort/bunker/gun emplacement on the tallest headland, facing the mouth of Resurrection Bay. The fort — bunker — has about 12-18 rooms, ranging in size from large broom closets to a couple of one-car garage sized spaces. Headlamps or flashlights are a must. Outside are two gun emplacements (without the guns).

The hike never gains much elevation, topping out at 650 feet. There is a ranger station at North Beach, with latrines, a large bear box, creek for water, and a pavilion with picnic tables for cooking. For campsites, there are only a couple in the forest, several behind the beach berm, and some in the footprint of the old pier pylons on the south side of the beach. (There’s also latrines at two public use cabins on the beach walk down, and one up at the fort. At the second cabin on your way down is a water source, and another just up from there. Pretty civilized hike.

Skyline-Fuller Lakes Traverse


Trick or Treat: What’s Behind Cairn #2?

I recently backpacked this with the kids for two nights, although you could hike it in a long day — probably at least 9 hours. It’s a great hike, and there are several hiking books that will fill you in on the details, so I won’t bore you with them. You can run it from either end: Skyline trail or the Fuller Lakes side; it’s a well marked trail, pretty strenuous, no water in the middle ridge walk except for snow, etc. Pretty normal trail.

Except for one thing.

If you hike this from the Skyline side, as you work down from the final ridge to Fuller lake — it’s more likely than not that you will lose the trail entirely. Which can lead to bad things.

Both pictures below have you looking at Fuller Lake and the final ridge of the hike, roughly looking from the north down to the southeast. The purple line is the main trail that leads off the ridge, and while the books mention in passing that it might not be easy to find, they are not joking. The trail is pretty much invisible as it leaves the ridge, and everyone I’ve talked to here — native Alaskans who do this sort of thing all the time — all of them have missed the trail at least once, and had to bushwhack through dense, dense, marshy undergrowth for hours before finding the trail again. I include myself — it turned into something of an existential crisis for the kids, and added three hours to the hike. Not fun.

The  Culprit

So bring your map and compass, GPS, and a lunch. Don’t underestimate this part of the hike. (One technique is to cut down off the ridge very early, and run into the trail by default. I’ll go with the compass and GPS next time.) 

There are, however, a series of cairns along the ridge as you walk down it toward the north, probably showing several ways to cut down early or actually indicating the trail. I counted three: two small and one rather larger. There is also, much farther down the ridge, an arc of large stones (about three feet long) set into the ground. I’m assuming this arc was meant point to the hairpin turn off the ridge, but will have to test my hypothesis next time. Also, if that arc of stones isn’t it, I’d imagine one of the cairns earlier in the trail is the way down — again, something to explore the next time out.

The Culprit, Profile View
This trail has sandbagged a lot of people. Most people don’t hike it from the Skyline side just because of this “feature.”

Be careful.

Alaska, backpacking, camping, hiking, Kenai Peninsula


Headquarters Lake

One more skiing option while staying on the Kenai Peninsula. If you’re near Soldotna, give Headquarters Lake a try. Great 3.5k groomed (most of the time) track on the surface of the lake, probably the best place on the peninsula to stretch out and work on your form.

Find your way to the Kenai National Wildlife Refuge’s visitor center (just south of Soldotna), and park. You can either walk or ski to the lake (about 300 yds) depending on the snow. Watch the trip through the woods down to the lake, the snow can get hard, and the trails narrow — little room for error correction.

Great stuff.

skate ski cross country skiing Soldotna Alaska

Devils Pass

Rode from the Devils Pass trailhead to Cooper Landing today: Devils Pass Trail to Resurrection Pass Trail, then in to Cooper Landing at the Bean Creek trailhead. Roughly 25 miles, and seven hours.

Compared to the Russian Lakes and Johnson Pass trails, this was a bit longer and much more varied in terrain and elevation. The elevation change was roughly ~1800 feet, and a large part of the Devils Pass trail was above treeline. Neither of Russian or Johnson have that feature, and with Russian Lakes trail in particular, you are down in the brush for most of the time, which gets a little creepy considering all the bear scat. Up in the Devils Pass things were a little less tense; nothing is going to sneak up on you.

The trail conditions were varied as well, some parts on the first third of the ride were somewhat rocky bordering on technical (probably a mile in total), with the trail becoming downright civilized in the valley leading in to Cooper Landing. The ~1800 foot gain is pretty gradual, for the most part NOT  a granny-gear grind. The ending section of Devils (before meeting up with the Resurrection Pass trail) was a delight, above tree line, with good singletrack, even under some VERY wet conditions.

The Pass

The Devils Pass trail meets up (ends basically) with the Resurrection Trail which runs from Cooper Landing into Hope. After meeting up, the trail gets a little more rutty, but more than makes up for any shortcomings after you pass the Swan Lake cutoff. From there to Cooper Landing the trail conditions improve consistently, until, after Juneau Lake, you are essentially riding a four-wheeler trail.

We double parked at the Bean Creek “trailhead” which is off the Slaughter Creek road, which is in turn off Bean Creek Road, right past the bridge in Cooper Landing. The trailhead itself is a wide spot in the road, where you can pull off and out of the roadway. The road itself actually continues for another mile or two and generally gets worse as you go. I’d imagine that most cars could get in and out, with one rough spot that could be a problem. There’s a nice loop at the end for parking the car if you make it. Either way, you’re shaving about five miles of the run by parking there and not at the Resurrection Pass trailhead on the Sterling Highway. (2014 edit: And if you risk the road to the end, it’s only ~1.6 miles to the Resurrection Pass trail cutoff.)

All in all, it was a great trip. I can’t say the same for the other two trails I mentioned, but I’d definitely ride this one again.

Caviar

I’ve had a couple of bad experiences with cured Sockeye roe, but was given some recently, and decided to let it rise or fall to the challenge of a proper caviar presentation.

The French Laundry Cookbook has a great recipe for blinis, there were fresh chives growing in the yard, and good cottage cheese in the fridge… I put it all together…

This was awesome — someone finally nailed the recipe — every bit as good as paddlefish roe (that sells in a lip-balm sized container for $70.) 
Recipe to follow at some point.