Way Out

Demon, exorcised.

For hikers, the Skyline-Fuller lakes traverse is the Kenai Peninsula’s version of the Bermuda Triangle. Every person who has hiked it from the Skyline side knows the trail down from the final ridge to Upper Fuller Lake means bushwhacking. Usually way more than intended.

No more.

The Route

A Little Closer

In the top figure, the purple line is the path shown on “the map”. (That trail is probably overgrown, and that may be something to explore on another trip.) The red line is the way off the ridge, down to a large cairn on a smaller ridge about 3/4ths the way down to the valley. The path from the cairn to the lake has been repeatedly flagged, and is a straightforward hike.

Getting Down

At the beginning of the red line on the ridge, on the trail itself is a small metal marker spray painted an unnatural fluorescent green. That marker has an attached aluminum plate, about the size of a playing card that reads:

TRAIL DOWN TO FULLER LAKE
START DOWN NOW

Do this. Start down the hill and look for flagging tape as you go. About 100 yards down the hill you should see another marker–identical to the first– on a small rise, that reads:

TRAIL TO FULLER LAKE LOOK
FOR PINK MARKER TAPE


The Cairn

Looking Back up from the Cairn

From that marker you should be able to follow the intermittent tape to the gravel patch and cairn. Alternately, the top rock of the cairn has been wrapped in pink flagging tape, which should be visible to sharp eyes, or a using a pair of binoculars, from the ridge. Also, note in the first figure the two banks of trees that form a U-shaped feature on the side of the ridge. Starting down before the first bank of trees, and keeping that to your left will lead you to the cairn, and out.

Here is the GPS route as a Google Earth file:

Link.

Short video that shows the view from the cairn:


Skyline-Fuller Lakes Traverse


Trick or Treat: What’s Behind Cairn #2?

I recently backpacked this with the kids for two nights, although you could hike it in a long day — probably at least 9 hours. It’s a great hike, and there are several hiking books that will fill you in on the details, so I won’t bore you with them. You can run it from either end: Skyline trail or the Fuller Lakes side; it’s a well marked trail, pretty strenuous, no water in the middle ridge walk except for snow, etc. Pretty normal trail.

Except for one thing.

If you hike this from the Skyline side, as you work down from the final ridge to Fuller lake — it’s more likely than not that you will lose the trail entirely. Which can lead to bad things.

Both pictures below have you looking at Fuller Lake and the final ridge of the hike, roughly looking from the north down to the southeast. The purple line is the main trail that leads off the ridge, and while the books mention in passing that it might not be easy to find, they are not joking. The trail is pretty much invisible as it leaves the ridge, and everyone I’ve talked to here — native Alaskans who do this sort of thing all the time — all of them have missed the trail at least once, and had to bushwhack through dense, dense, marshy undergrowth for hours before finding the trail again. I include myself — it turned into something of an existential crisis for the kids, and added three hours to the hike. Not fun.

The  Culprit

So bring your map and compass, GPS, and a lunch. Don’t underestimate this part of the hike. (One technique is to cut down off the ridge very early, and run into the trail by default. I’ll go with the compass and GPS next time.) 

There are, however, a series of cairns along the ridge as you walk down it toward the north, probably showing several ways to cut down early or actually indicating the trail. I counted three: two small and one rather larger. There is also, much farther down the ridge, an arc of large stones (about three feet long) set into the ground. I’m assuming this arc was meant point to the hairpin turn off the ridge, but will have to test my hypothesis next time. Also, if that arc of stones isn’t it, I’d imagine one of the cairns earlier in the trail is the way down — again, something to explore the next time out.

The Culprit, Profile View
This trail has sandbagged a lot of people. Most people don’t hike it from the Skyline side just because of this “feature.”

Be careful.

Alaska, backpacking, camping, hiking, Kenai Peninsula


Resurrection Pass Trail

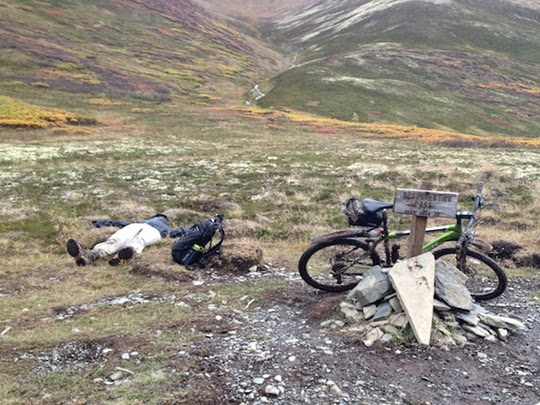
Five minute break—smoke ’em if you’ve got ’em.

The Big One

I mountain biked Resurrection Pass trail from Hope to Cooper Landing on Saturday. Of all the backcountry trails that you can bike on the Kenai, this is the longest and is certainly a world-class ride. Not particularly technical or steep, just the sheer distance of the trail itself gives a lot of riders reason to put it off. It certainly did for me. I’m happy to report that even with the length, the trail is fairly innocuousIt clocked right at 60 km (37 mi.) on the gps, with wheel spin time coming in at about six hours. If you are in reasonably good shape — you’ll be fine. Just start early and give yourself plenty of time.

From Hope

The usual recommendation is to run the trail north-to-south, even though the rise from either end is exactly the same, starting at an elevation of 400 feet on either end and peaking at 2600 feet at Resurrection Pass. The reason for running from Hope and not Cooper Landing comes from the gradual climb from Hope to the pass — taking back that elevation on the way down mostly in two steep declines, one near Swan Lake, and another just 4 miles from the southern trailhead. After running it, I’d agree wholeheartedly — the climb out of Cooper Landing alone would be fairly rigorous.

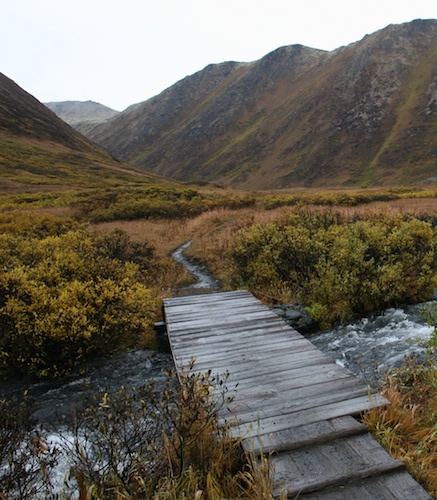
The trail/climb from Hope to the pass is fairly kind. The trail is wide and in fairly good condition — the usual rocks, roots, and mud — but mostly wide open. The climb is fairly gentle; the only real exceptions were where the trail dips down to cross a creek or stream. What is a nice run down is paid off with a fairly rigorous climb back out, but just as you think you’ll have to get off and walk it — the trail relents and continues the gentle incline. That continues for just about the first half of the overall trail, almost up the the summit.  Once out above tree line (which doesn’t really happen until just a few miles from the summit), the terrain does roll a bit more but still nothing that will make you get off and walk. 
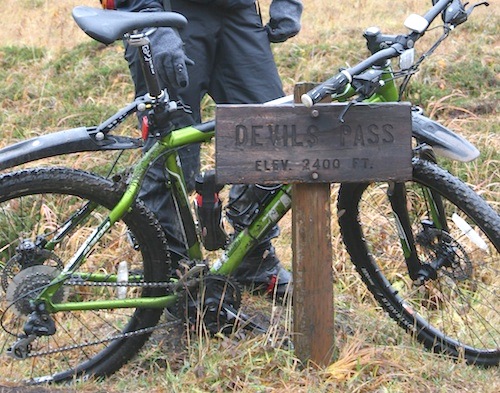
Fake out

One thing to note is that once you do emerge from tree line, you’re going to look dead ahead and see what looks like “the T” — and the far side of the valley where Resurrection Trail meets up with Devil’s Creek Trail. Don’t be fooled; what you’re looking at is actually just a continuation of the same valley, with the pass “around the bend” to your right. You will actually have arc to your right a mile or two until you come around almost 45 degrees. At about the point you get to the sign marking the summit, you are looking at the actual far side of the valley where “the T” is. That terrain feature threw me and made the “when are we ever going to get to the summit” part a little tedious.

Back down

The way down comes in roughly three stages. There is a fairly fast (but rocky) run through “the T” and to your right, across the saddle, until you have to climb just a bit before beginning a somewhat technical section down to the valley just below Swan Lake. Next, there is a fairly monotonous run down the valley, past Juneau Lake toward Cooper Landing, on a trail the gradually improves — although it tends to be muddy. (Muddy in an annoying way, not bad enough to do much more than cover your bike in ooze.) The third stretch comes after a cutoff that either runs to the Bean Creek trailhead (straight), or the Juneau Falls route (right) that runs to the trailhead on the Sterling Highway. I’ve taken both, and the Bean Creek run, while a little rougher, is about half the distance. If you take the Juneau Falls run, it winds up and down for most of the roughly five miles — and really only begins its decline within the last mile or so. Generally, the trail is fine, with some annoying sections of rocks and roots here and there.

Water

On this last route, I didn’t pack all the water I needed but brought a UV system to refill as I went. My Steripen failed even with fresh batteries (from what I’ve gathered, this is not an isolated incident), and I had to rely on another party’s “All Clear” UV bottle that Camelbak manufactures. I can’t say enough good about that product — roughly $90 online.

At any rate, there are many places to refill along the way. Be sure to buy some purification drops as a backup in case your UV fails you. The rivers coming straight off the mountain are almost certainly fine, but in the pass itself there are long series of beaver ponds, so anything from there to the trailhead in Cooper Landing will be drawing on that source.

Overgrowth

Resurrection Pass trail is fairly well maintained, and even though I waited for a killing frost to knock down the vegetation, I wouldn’t be afraid to run it earlier in the year. The forests and up above tree line make up almost all of the trail, so the danger of having to snorkel through chest-high wet grass is limited to a very short section (probably a mile). And with the amount of traffic the trail sees, even that shouldn’t be much of a problem.

Data

I’ve attached the .gpx file of the trail taken from the GPS data from this run. (Right click and do the “save as” thing.) Dropbox link for .gpx file.

Devils Pass

Rode from the Devils Pass trailhead to Cooper Landing today: Devils Pass Trail to Resurrection Pass Trail, then in to Cooper Landing at the Bean Creek trailhead. Roughly 25 miles, and seven hours.

Compared to the Russian Lakes and Johnson Pass trails, this was a bit longer and much more varied in terrain and elevation. The elevation change was roughly ~1800 feet, and a large part of the Devils Pass trail was above treeline. Neither of Russian or Johnson have that feature, and with Russian Lakes trail in particular, you are down in the brush for most of the time, which gets a little creepy considering all the bear scat. Up in the Devils Pass things were a little less tense; nothing is going to sneak up on you.

The trail conditions were varied as well, some parts on the first third of the ride were somewhat rocky bordering on technical (probably a mile in total), with the trail becoming downright civilized in the valley leading in to Cooper Landing. The ~1800 foot gain is pretty gradual, for the most part NOT  a granny-gear grind. The ending section of Devils (before meeting up with the Resurrection Pass trail) was a delight, above tree line, with good singletrack, even under some VERY wet conditions.

The Pass

The Devils Pass trail meets up (ends basically) with the Resurrection Trail which runs from Cooper Landing into Hope. After meeting up, the trail gets a little more rutty, but more than makes up for any shortcomings after you pass the Swan Lake cutoff. From there to Cooper Landing the trail conditions improve consistently, until, after Juneau Lake, you are essentially riding a four-wheeler trail.

We double parked at the Bean Creek “trailhead” which is off the Slaughter Creek road, which is in turn off Bean Creek Road, right past the bridge in Cooper Landing. The trailhead itself is a wide spot in the road, where you can pull off and out of the roadway. The road itself actually continues for another mile or two and generally gets worse as you go. I’d imagine that most cars could get in and out, with one rough spot that could be a problem. There’s a nice loop at the end for parking the car if you make it. Either way, you’re shaving about five miles of the run by parking there and not at the Resurrection Pass trailhead on the Sterling Highway. (2014 edit: And if you risk the road to the end, it’s only ~1.6 miles to the Resurrection Pass trail cutoff.)

All in all, it was a great trip. I can’t say the same for the other two trails I mentioned, but I’d definitely ride this one again.

Russian Lakes Trail

Rode Russian Lakes Trail today. 
We doubled parked and rode it from Cooper Lake to the trailhead near Cooper Landing. Compared to my experience with Johnson Pass Trail (in late August), this was a bit easier, and we were able to average 5.9 mph — getting on the trail at 8:30, and off at about 1pm, for 22.2 miles. The trail conditions were good throughout, starting with great 4-wheeler track that gradually congealed into single track after 3-4 miles.  After that, there were the normal amount of roots, mud, and rocks, with the foliage (devil’s club) starting to close up the trail in several 100-150 yd sections. Probably about five miles from the Cooper Landing side, there is a creek/gully without a bridge that pretty much guarantees you’ll get your feet wet. The trail in general was in good shape.
Looking at the National Geographic map for the Chugach/Kenai NWR, there is a notation that this trail is rated “Difficult” where the Johnson Pass Trail is rated “Moderate.” That seems odd — if anything, Russian Lakes was easier (maybe just going from the high side to the low side made it a bit easier). But in general, the trail conditions — in terms of rocks, roots, mud, etc. — were the same. You could probably make the case that Johnson’s Pass is more dangerous in terms of drop-offs/gullies next to the trail. I was worried that the Russian Lakes would be “technical” in light of the rating on the map, but other than the amount of overgrowth (Johnson Pass was MUCH worse in late August in terms of grass and Devil’s Club) the two trails seem the same in most respects. 
Other than that, things got a bit tense from all the bear scat and bear precautions — and we did see one small Blackie (running away). There’s something to be said for seeing the wildlife from the tour bus — you’re definitely not quite at the top of the food chain when you leave your vehicle.